
Pallet Racking Components Explained
A clear guide to the key components that make up a pallet racking system, how they work and why they matter for safety, performance and compliance.
SEMA-Approved
UK Wide coverage
Experienced inspectors
The component guide
Key pallet racking components
Each component plays a vital role in the strength, stability, and safety of your racking system.
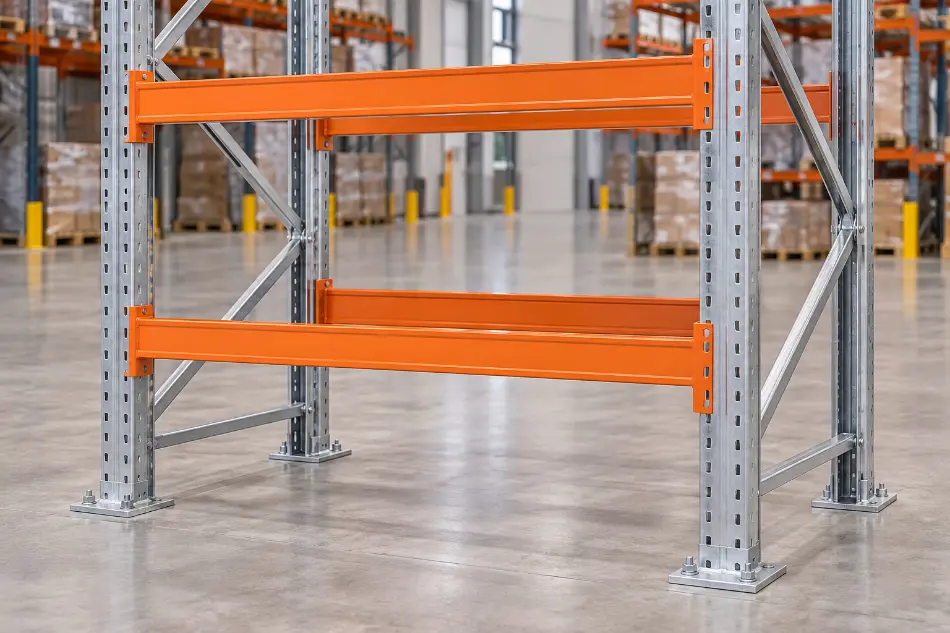
Racking frames
Racking frames consist of front and rear uprights with baseplates at the foot of each section to provide stability and transfer weight to the floor slab. Securing these baseplates to the slab keeps the rack mechanically fixed in place. Frame braces join the uprights to provide the rigidity needed to support loads once beams connect them into racking bays. Depths range from 400 mm to 3000 mm, though 900 mm and 1100 mm are the most common.
Your pallet depth dictates the required frame depth.
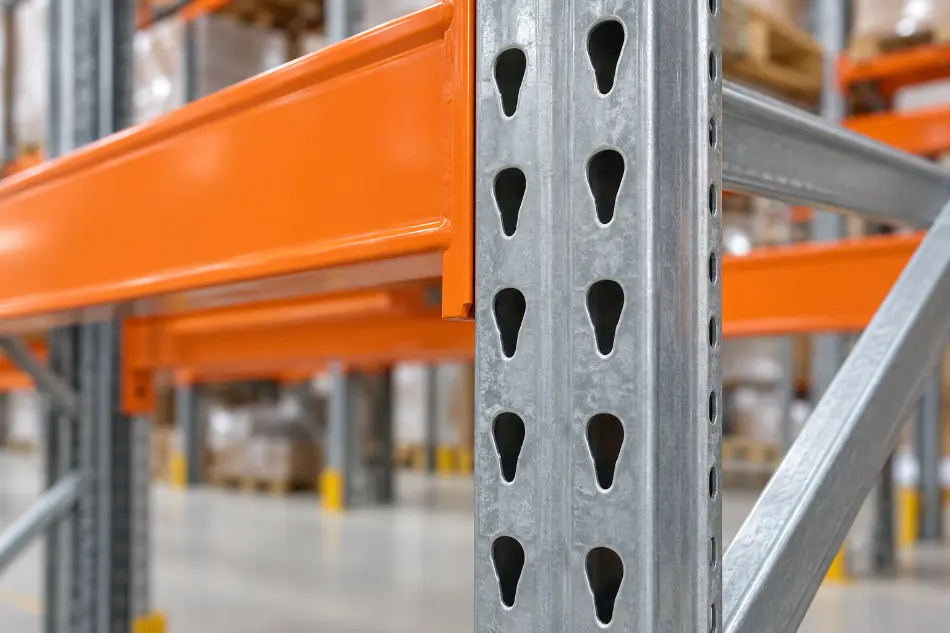
Racking uprights
A cold-formed steel section designed specifically to support downward vertical loads. Each manufacturer offers proprietary designs rated for different load-bearing capacities (referred to as “duty”), which are typically stamped on the front or side face. For any installation, your installer or manufacturer must carefully assess maximum bay and beam loads to ensure the uprights meet site-specific requirements. Beams usually seat into slots on the front face, though louvres are also used.
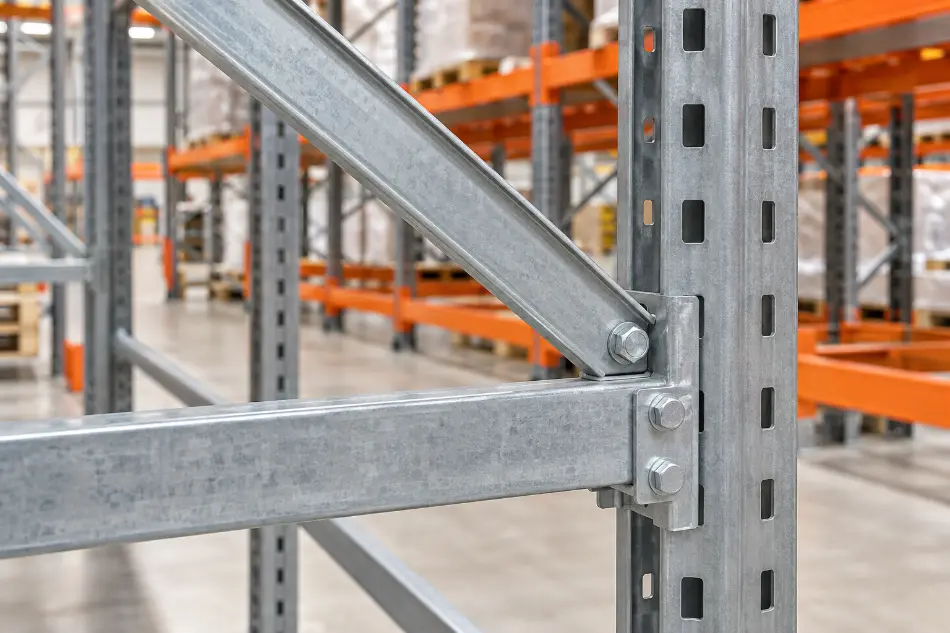
Frame bracings
Racking frame bracings are typically bolted or welded to the front and rear uprights to maintain frame squareness and rigidity. They help transfer weight to the floor slab and provide impact resistance. Damage to lower-level bracing is particularly critical due to cumulative loading from above, though all bracing plays an essential role in structural stability.
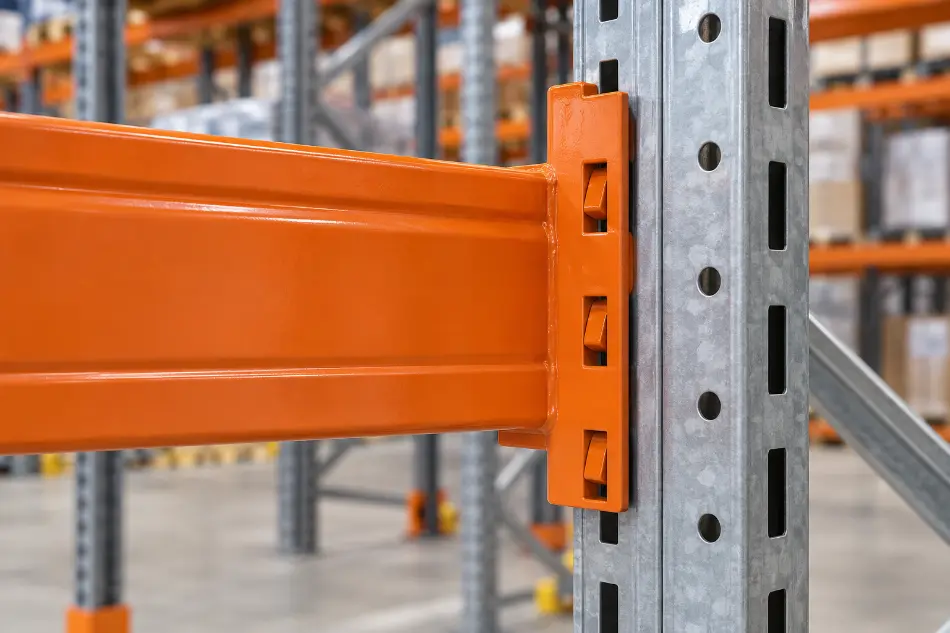
Racking beams
Racking beams are horizontal bars slotted into the face of the uprights to support pallets. They come in various profiles—typically open section, box section, or RSJ—and are sized to match the required pallet weight and bay span. While 2700 mm and 3300 mm are the most common lengths, custom sizes are available. Each beam is designed and load-tested for specific requirements, so capacity varies and is not automatically rated at 2000 kg.
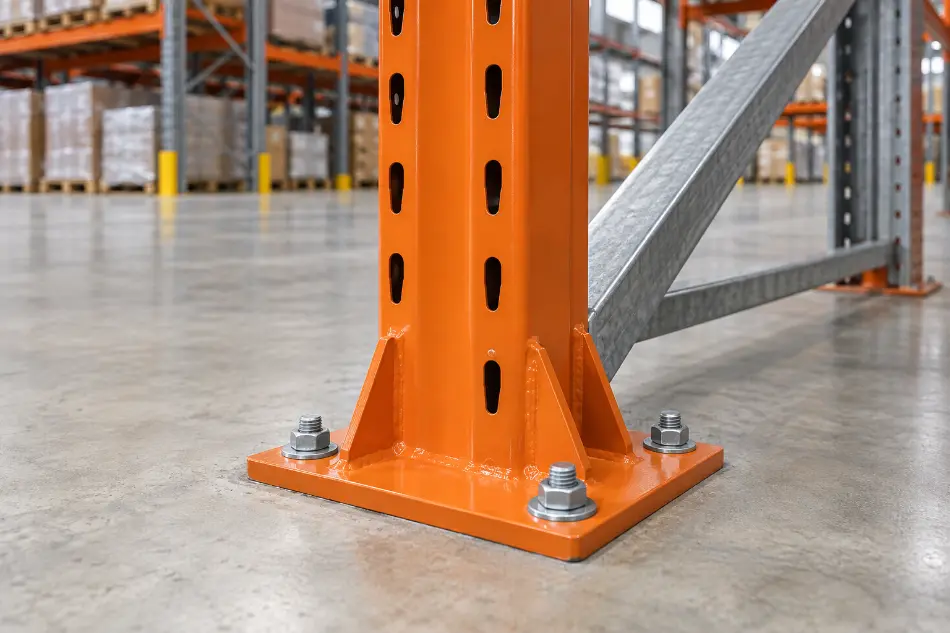
Racking baseplates
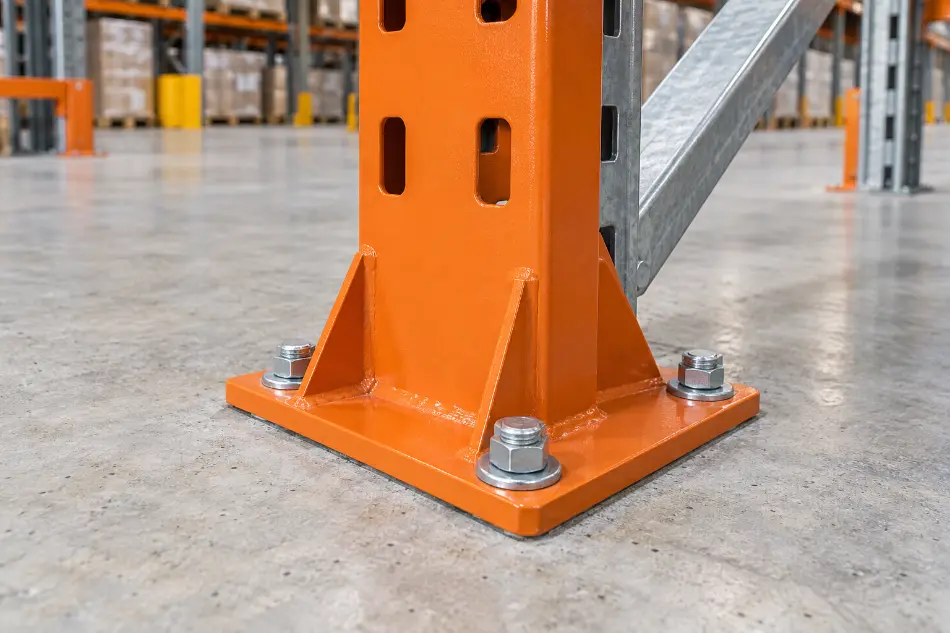
Floor fixings
Floor fixings play an essential role in warehouse racking systems by maintaining structural stability and transferring loads. While a single anchor is usually fitted per baseplate, design requirements may specify two or more floor fixings. Standard specifications require each floor fixing to withstand a shear force of 5 kN and a tension force of 3 kN.
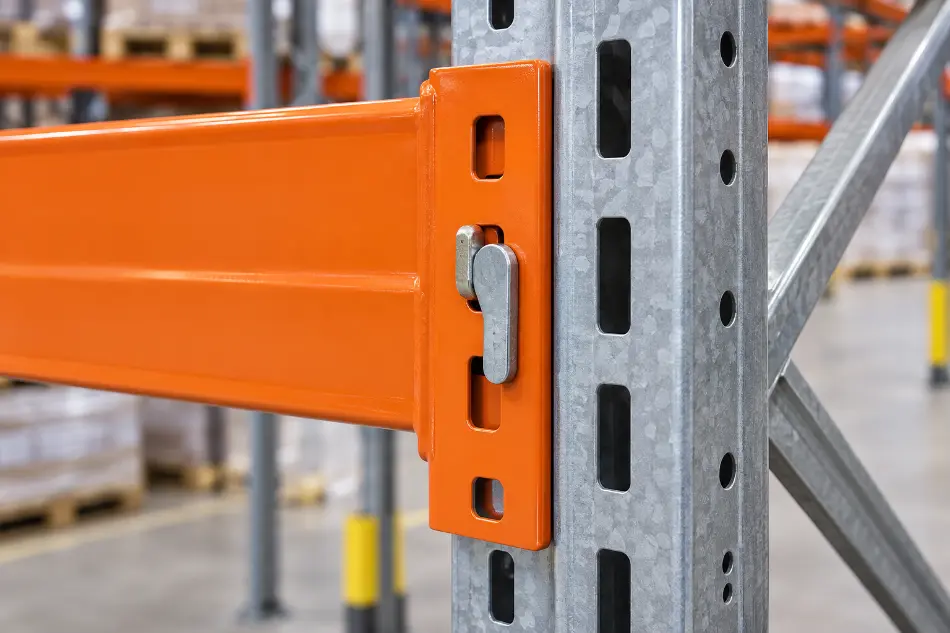
Beam Safety Locks
Beam safety locks are amongst the lowest-cost components in a warehouse racking system, yet they remain vital for operational safety. Fitted at both ends of a beam, they ensure correct alignment and prevent accidental dislodgement from upward impact during routine operations. Locks are manufactured in metal or plastic (such as Apex designs) and feature brand-specific fittings. Using the exact manufacturer-matched lock is essential; if you are unsure of your system type, send us a photograph for identification assistance.
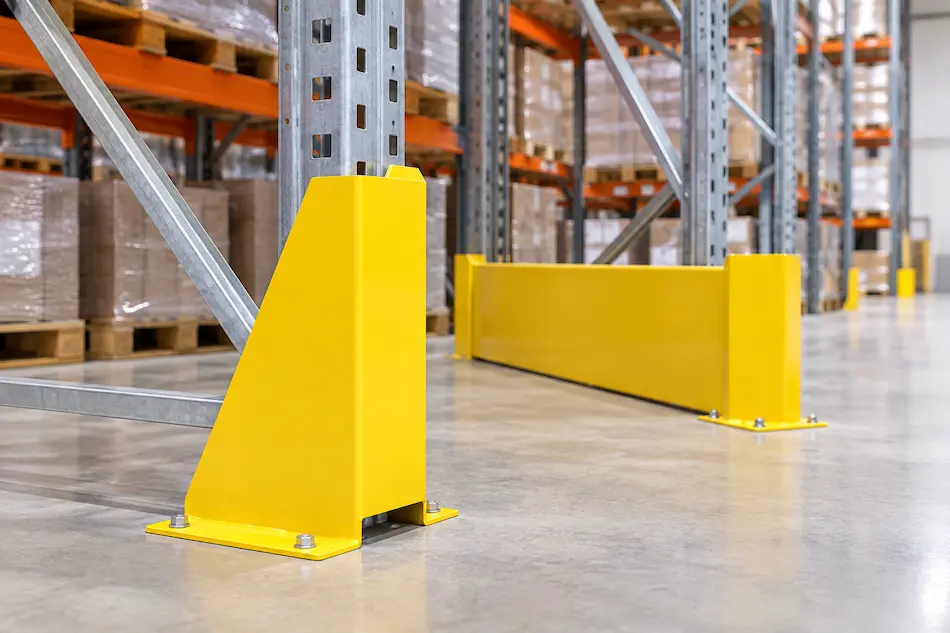
Rack Protection
Racking protection comprises retrofitted guards designed to shield uprights and end frames from impact. Within aisles, protection should serve as a last resort, with root-cause damage prevention prioritised first. However, Health and Safety Executive (HSE) guidance (HSG76) requires protection at aisle ends and transfer bays to ensure end frames are adequately shielded. Where goods are stored directly against end frames, low-level full-depth protection should be installed to prevent damage from stock or materials handling equipment (MHE).
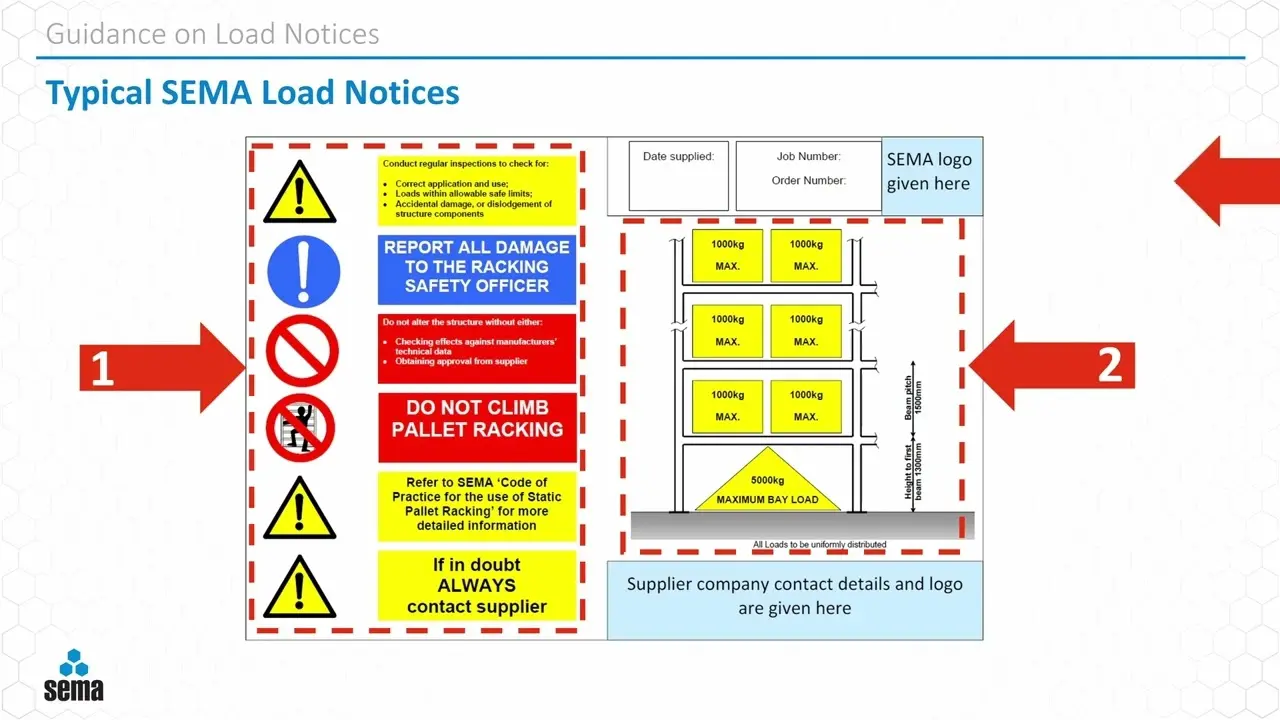
Racking Load Notices/SWL Notices
The SEMA load notice is a key piece of information relating to the individual racking structure. It gives general Health & Safety information, including warnings, but more importantly, shows manufacturer information on loadings and design details at the original time of installation.
Load notices displayed on racking after 2012 should be displaying height to first beam, beam pitch, beam load, bay load, date, reference number and the traceability information of the company that provided the notices.
Should the rack, for any reason, be reconfigured, the racking load notice MUST be updated to reflect the new layout with the original manufacturer’s data.
Load notices should be displayed on all storage equipment, so whether you have a single shelving bay or a mezzanine floor, safe working load notices should always be displayed.
INSPECTION PRIORITIES
What inspectors look for
| Component | Common issues | Why it matters | Inspection priority |
|---|---|---|---|
| Frames | Distortion, impact damage, poor alignment | Affects overall stability | High |
| Uprights | Bends, dents, hole damage | Reduces load capacity | High |
| Beams | Impact damage, missing safety locks | Can lead to beam failure | High |
| Bracing | Missing or damaged bracing | Reduces stability | High |
| Baseplates | Damage, corrosion, movement | Affects load transfer to floor | Medium |
| Floor fixings | Loose, missing or incorrect fixings | Can allow racking to move | High |
| Safety locks | Missing or damaged | Beams can become dislodged | High |
SEMA Damage Classifications
Understanding inspection outcomes
Under SEMA Standards and Guidelines and EN15635 damage limits of components have been adopted since the mid 80’s with colour coded risk classification categories to reflect the seriousness of issues and the response required.
Red Risk
Very serious damage requiring immediate action. Areas where a high level of damage is identified of over twice the SEMA limits. This warrants immediate offloading and isolation of the affected area until repair work is carried out.
Amber Risk
Hazardous damage requiring action as soon as possible. Areas where the damage identified is greater than the SEMA limits. This warrants remedial work to be carried out. However, the damage is not sufficiently severe to warrant the immediate offloading of the area.
No additional loads shall be placed in the affected area and, once the pallet positions in this area are emptied, they should not be refilled until the repairs are carried out. If repairs are not carried out within 4 weeks, an Amber risk item automatically becomes a RED RISK item.
Green Risk
Damage requiring surveillance. Areas where damage is present, however, the level of damage is within the SEMA limits and should be recorded for further consideration at the next inspection.
Any damage will result in a reduced safety factor in the structure and deviations in excess of the SEMA limits should result in the affected area of the racking being offloaded. The course of action following categorization is shown in the following flow chart.
Book a professional racking inspection
Protect your people, your stock and your business with a thorough, independent racking inspection from UK Rack Inspection.